Contents
- Designing the Cube
- Draft Rules + 1st Turn Rules
- Cube Card List
- “Tribal” Archetypes
- Synergistic archetypes
- Drafting priority
- Successful Decklists
UPDATED CUBE LIST
An updated cube list can be found on Cube Koga – I will try my best to keep the list updated on here as well, but the most recent version will always be kept up to date at the following link:
https://cubekoga.net/Cube/DeltaCube
Designing the Cube
When designing a cube, it’s important to keep one question in mind: “Why is a CUBE the best way to play the games we want?” The first time we built a cube, Cody and I had a massive project – we ended with 1,080 draftable cards, there were a lot of game-breaking and unfun combos, and the draft process took an extremely long time. Rather than re-vamp that cube, we decided to start again from scratch, and this is the cube we came up with.
Pokemon provides 2 very unique challenges for cube drafting. Unlike in Magic: The Gathering (where cube drafting originated), we have to deal with the problem of evolution lines. If you are required to draft evolution lines, your draft process ends up being very linear, since picking a couple of Blastoise essentially locks in your picks for later packs. The second challenge is Energy. In Magic: The Gathering, Mana (their version of energy) are played directly onto the field and used to cast everything, whereas in our game, Energy are only attached to 1 specific pokemon at a time.
We decided to borrow a rule from Michael Slutsky’s cube: Only final evolutions would be drafted, and the corresponding stage 1s and basics would be “gifted” to players at the end of the draft phase. This would allow players to draft multiple different evolution lines, and make it easier for us to fit a wider variety of strategies into only 360 cards (since we wanted to cut down from the massive number of cards in our 1st attempt.)
We also knew we wanted to stay within a block of sets if possible – one of the problems from our first cube is that even though it was supposed to be ex era through Heartgold/Soulsilver, nearly all of our attackers came from the DP/HGSS eras of pokemon, as power creep made them stronger. We also needed to somehow solve the problem of energy – and we figured that Delta Species would be the perfect way to solve both problems at once!
Cody and I started playing around 2007, and in this time, Delta Species pokemon were all the rage – they were pokemon printed as completely different types than they normally would be. In order to accommodate for the wildly different typing, Pokemon decided to print a plethora of special energy cards, ESPECIALLY ones that provided all energy types at once (Double Rainbow, Scramble, and Holon’s Castform to name a few.) As a result, decks in this era could seamlessly weave together several different attacking types, which led to (in our opinion) some of the most creative and diverse deckbuilding strategies, as well as some of the most engaging and skill-intensive interactions in Pokemon’s rich 20+ year history.
After a couple of cube test runs, we decided to add a couple of cards from outside the delta species block, since there were some effects (such as hand disruption and gust effects) that were practically non-existent in this timeframe. However we decided it would be best to keep all cards within the ex era, to avoid the power creep of Diamond/Pearl sets, which was one of our mistakes in our 1st cube.
With all those changes being made, we have arrived at the list of cards below. We are still tinkering with the cube today, and I don’t know if we will ever settle on a “perfect” 360 cards, but the list below has proven fun and challenging to draft. We hope you enjoy it the same way that we do!
Draft Rules
- Players draft 6 packs of 15 cards (all the cards in the cube)
- Draftable cards consist of Final Evolutions, Special Energy, and Trainer cards. Pre-evolution pokemon are given out depending on what each player drafts. (If you pick 1 Dragonite, we will give you Dragonairs and Dratinis)
- Each player receives 4 Delta Rainbow Energy, 4 Special Metal Energy, and 4 Special Darkness Energy upon draft completion
1st Turn Rules
- The player who wins the coin flip may CHOOSE whether they go 1st or 2nd
- The coin flip takes place AFTER the players have set up
- The player who goes first may not play any Trainers (Items), Supporters, or Stadiums
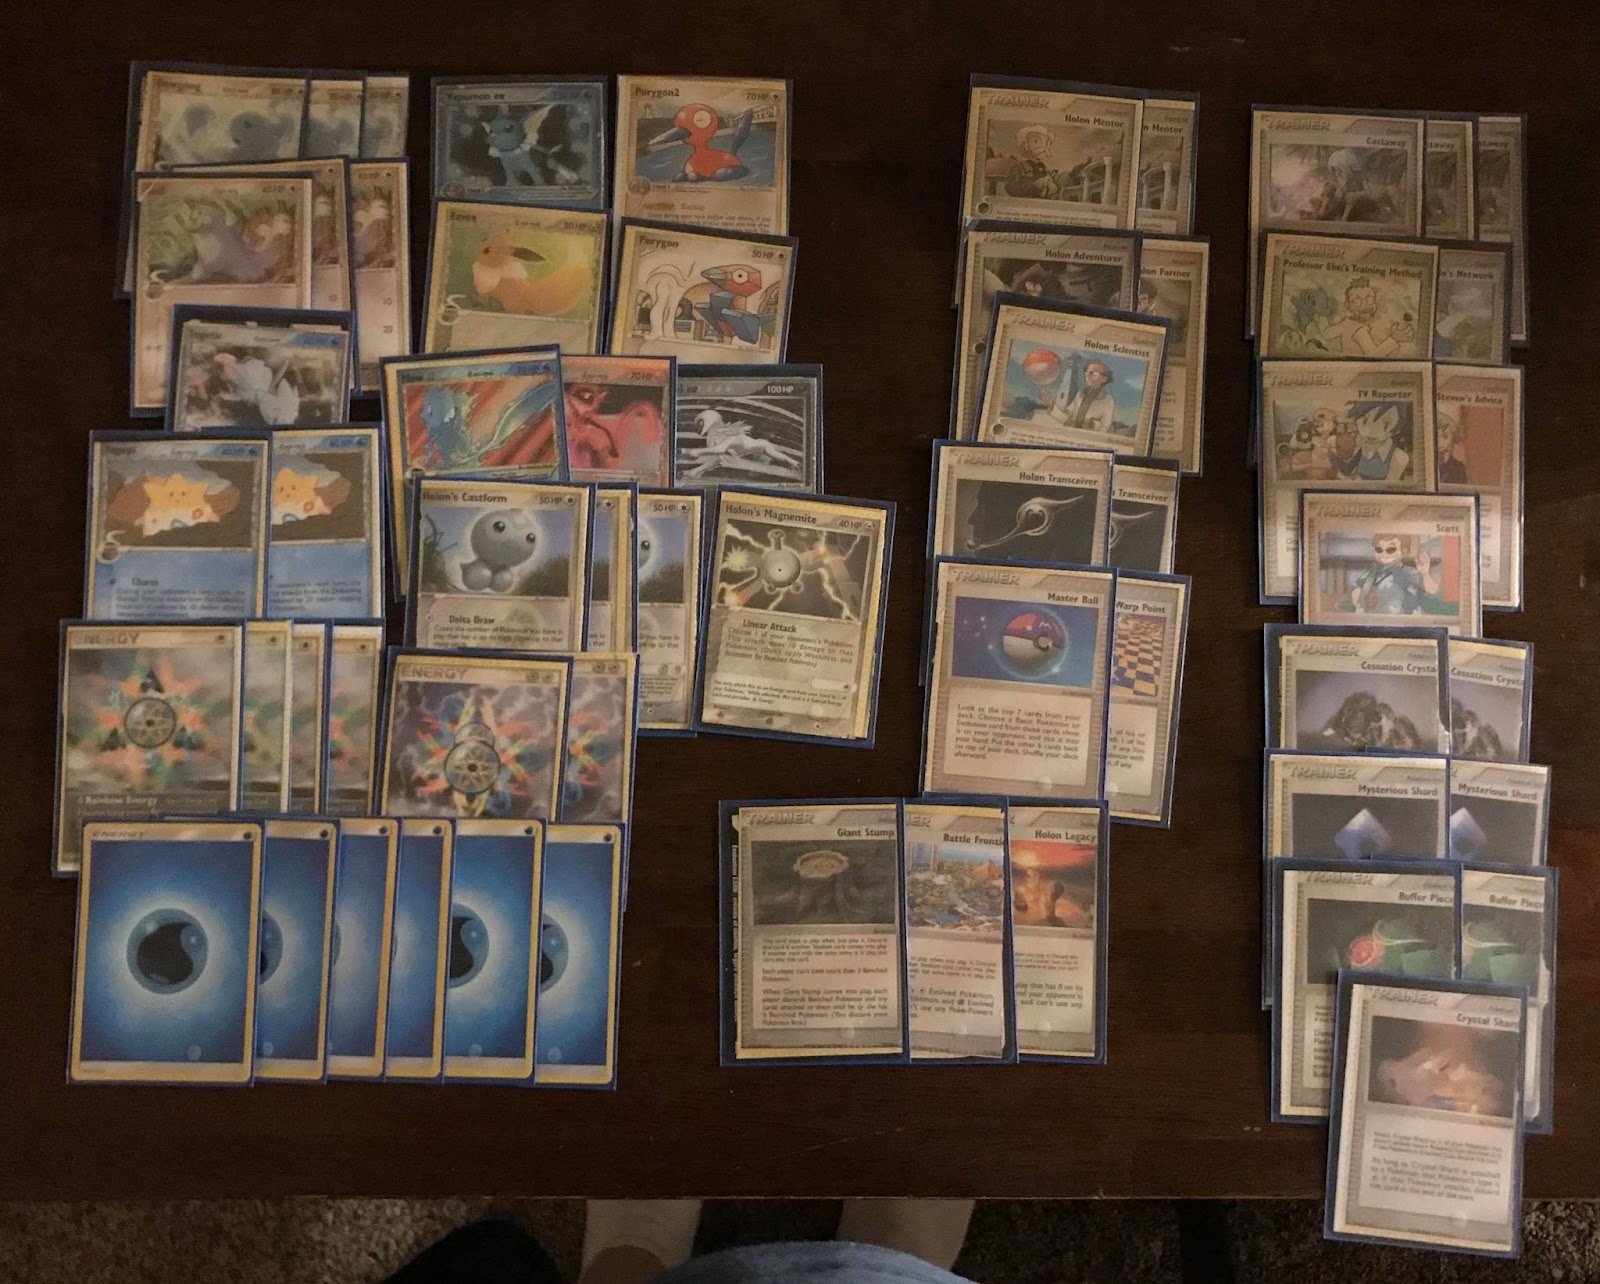
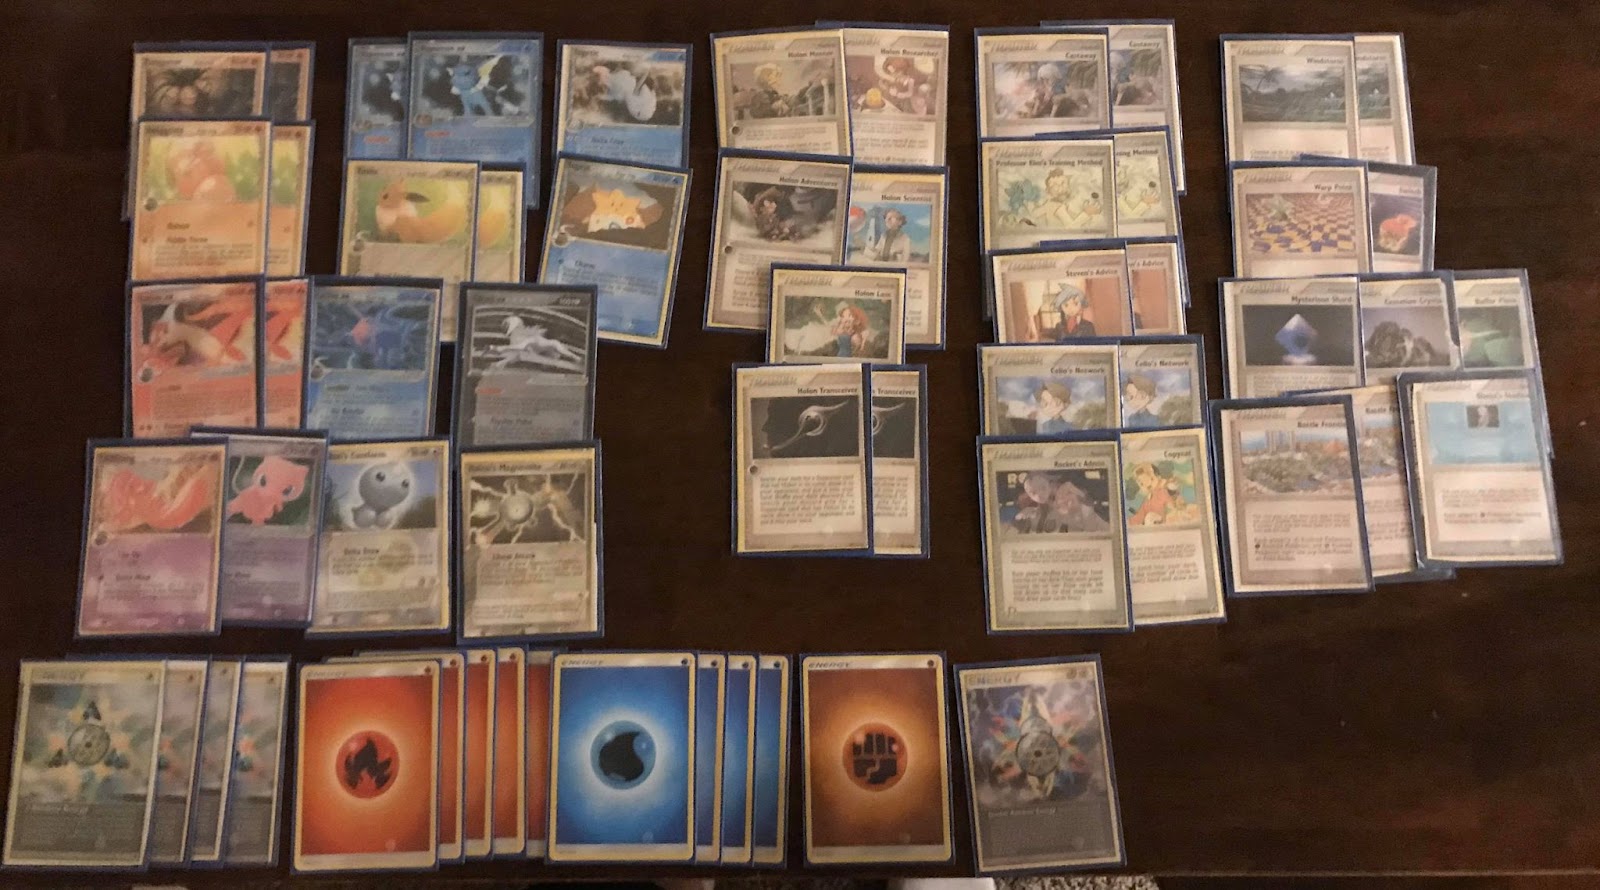
CUBE DRAFT LIST
Bolded Pokemon below are non-delta species
- Fire:
- 2 Gardevoir ex Dragon Frontiers
- 3 Milotic Dragon Frontiers
- 3 Kingler Crystal Guardians
- 3 Kingdra Holon Phantoms
- 3 Salamence Delta Species
- 2 Mewtwo Delta Species
- 2 Latias EX Dragon Frontiers
- 1 Latias Holon Phantoms (11/110)
- Water:
- 1 Mew Gold Star Dragon Frontiers
- 2 Salamence ex Dragon Frontiers
- 3 Altaria ex Dragon Frontiers
- 2 Latios ex Dragon Frontiers
- 3 Togetic Dragon Frontiers
- 1 Latios Holon Phantoms (12/110)
- 2 Vaporeon ex Delta Species
- 2 Crawdaunt ex Holon Phantoms
- Grass:
- 2 Maganium ex Unseen Forces
- 3 Quagsire Dragon Frontiers
- 4 Flygon Holon Phantoms
- 3 Crobat Delta Species
- Fighting:
- 2 Kingdra ex Dragon Frontiers
- 2 Cloyster Dragon Frontiers
- 3 Meganium Dragon Frontiers
- 3 Exeggutor Holon Phantoms
- 3 Marowak Delta Species
- 3 Cacturne Crystal Guardians
- Electric:
- 1 Jolteon Gold Star Power Keepers
- 2 Jolteon ex Delta Species
- 3 Feraligatr Dragon Frontiers
- 3 Fearow Crystal Guardians
- 2 Metagross Delta Species
- 2 Dragonite Delta Species
- 3 Raichu ex Emerald
- Psychic:
- 3 Lickitung Dragon Frontiers
- 2 Sceptile ex Crystal Guardians
- 2 Mew ex Legend Maker
- 3 Metagross Deoxys
- 3 Gardevoir Delta Species
- 2 Espeon Delta Species
- 1 Mewtwo Gold Star Holon Phantoms
- 3 Jirachi Hidden Legends
- Dark:
- 2 Absol ex Power Keepers
- 4 Mightyena Delta Species
- 3 Nidoking Dragon Frontiers
- 3 Shiftry ex Crystal Guardians
- Colorless:
- 1 Latias Gold Star Deoxys
- 2 Tauros Crystal Guardians
- 3 Dewgong Dragon Frontiers
- 3 Ampharos Dragon Frontiers
- 2 Porygon2 Delta Species
- 2 Altaria ex Emerald
- 1 Latios Gold Star Deoxys
- Other Pokemon:
- 3 Holon’s Magnemite Delta Species
- 3 Holon’s Magneton Delta Species
- 8 Holon’s Castform Holon Phantoms
- Trainers (Items):
- 12 Rare Candy
- 8 Windstorm
- 4 Warp Point
- 4 Master Ball
- 4 Great Ball
- 4 Switch
- 14 Holon Transceiver
- 4 Dual Ball
- 4 Pow! Hand Extension
- 2 Swoop! Teleporter
- 2 Ancient Technical Machine Rock
- Pokemon Tools:
- 2 Solid Rage
- 3 Mysterious Shard
- 2 Crystal Shard
- 4 Cessation Crystal
- 4 Strength Charm
- 3 Buffer Piece
- 2 Fluffy Berry
- 2 Protective Orb
- 2 EXP. All
- Stadiums:
- 3 Crystal Beach
- 2 Phoebe’s Stadium
- 2 Low Pressure System
- 3 Battle Frontier
- 2 Holon Legacy
- 3 Cursed Stone
- 2 High Pressure System
- 3 Desert Ruins
- 2 Holon Ruins
- 2 Holon Lake
- 2 Magnetic Storm
- Supporters:
- 4 Celio’s Network
- 8 Castaway
- 8 Steven’s Advice
- 4 Scott
- 8 Holon Adventurer
- 4 TV Reporter
- 4 Professor Elm’s Training Method
- 6 Copycat
- 4 Holon Scientist
- 4 Holon Researcher
- 10 Holon Mentor
- 3 Holon Lass
- 4 Holon Farmer
- 4 Wally’s Training
- 4 Rocket’s Admin.
- 2 Mr. Briney’s Compassion
- 4 Mary’s Request
- Special Energy:
- 6 Double Rainbow Energy
- 6 Boost Energy
- 4 Scramble Energy
Deck Strategies
This section will contain archetypes that have proven themselves enjoyable thus far in the cube, although these are not the ONLY strategies you can use. I’ll also try to highlight key cards that are less obvious picks that work better within their specific archetypes than they might in other decks.
“Tribal” decks
The term “tribal” comes from Magic: the Gathering, and it references decks where all creature cards are the same type. So, if somebody ran a deck with only Elf creature cards, their deck would be called “Elf Tribal.” This section talks about archetypes that run their primary strategy off of different copies of the same pokemon.

Meganium is one archetype that can be centered around one specific pokemon. Meganium DF uses Evolutionary Call to quickly set up the rest of the deck, with a consistency that the other stage 2 decks can only dream of. Delta Reduction turns it into an absolute tank, while Meganium ex’s Nurture and Heal ability will not only accelerate energy into play, but also heal you in the process.
Key cards to look out for:
-Espeon DS – heals Meganium further, making it harder to take down
-Buffer Piece and Mysterious Shard – 2 pokemon tools that make Meganium much more difficult to KO
-Mr. Briney’s Compassion – Scooping up Meganium allows you to deny your opponent prize cards, and Meganium ex can accelerate the energy back into play.
-Holon’s Castform/Magneton – Meganium ex accelerating a grass energy, followed by attaching a Holon’s Castform makes it very easy to power up pokemon that use virtually any energy. Latios Star and Mewtwo Star are two fantastic examples.

The Gardevoir deck focuses on conserving energy – Gardevoir DS bounces energy around your entire board. Gardevoir ex has the option to bounce fire energy (including Double Rainbow, Holon’s Castform, etc.) to the bench. Gardevoir DS also punishes the opponent for filling up their bench too quickly, while Gardevoir ex will shut down Poke-Powers and Poke-Bodies.
Key Cards to look out for:
-Similar to meganium, Mr. Briney’s Compassion can come in handy when you have the ability to move energy cards before picking the pokemon up.
-Phoebe’s Stadium and High Pressure System can be used to make retreating to conserve prize cards a little easier.
-Latias ex can accelerate energy to itself early in the match before you are able to attack. Then, after your board is set up, Gardevoir DS can move all of the energy around.

Salamence has high energy cost on its attacks, but the trade-off is that both pokemon are absolute powerhouses. 160 HP on the ex is the highest in the cube, and 2 resistances makes it even tougher to take down. 80 damage is enough to OHKO a lot of the pokemon centered around lower HP/stage 1 pokemon, but you also have the option to split the damage up if the situation calls for it. Salamence DS on the other hand, threatens to OHKO almost any non-ex pokemon in the cube. It can accelerate energy to itself, but it does require a bit of setup to make it work.
Key Cards:
-High Pressure System is a good one for this deck as well, since both the ex and the regular salamence benefit from the lowered retreat cost.
-Altaria ex can accelerate energy to Salamence ex, and can also use its attack to hinder strategies based around spreading damage around your board.
-EXP. All can be a useful pokemon tool – since the energy costs are so high, being able to conserve energy is really nice. This deck also shares a weakness to Colorless – so this is a good way to protect yourself from a surprise Crystal Shard or Boost Energy.
-Double Rainbow Energy makes it easier to stream Salamence DS’s 2nd attack, but don’t go too overboard since DRE cannot be attached to the Salamence ex.
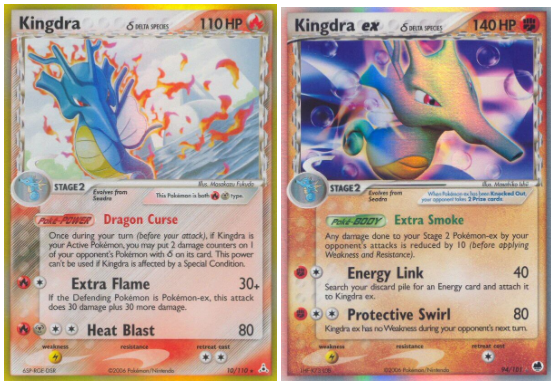
Kingdra is probably the least synergistic of the “tribal” archetypes, but it more than makes up for this in individual power. Kingdra HP can spread 20 damage around the board to any pokemon that are delta species, and its first attack punishes the opponent for running ex-heavy decks. Kingdra EX on the other hand, tanks hits really well, and also protects itself from weakness, which is very helpful against any electric decks that would otherwise run through the duo. Both of these cards can fit nicely into decks with other pokemon in the cube as well.
Key Cards:
-Kingdra HP can use Special Metal energy to tank hits, while both pokemon can effectively use Buffer Piece.
-Magnetic Storm is useful for Kingdra ex specifically – there are a lot of random pokemon in this cube that carry fighting resistance, so being able to hit through it can be the difference between a 2HKO or a 3HKO.
-Fearow CG can help get this deck set up a little more quickly by searching out the entire Kingdra evolution lines. This deck often has the room for it, since it doesn’t need to rely on healing, tech attackers, or energy acceleration like the other strategies might.

While the Flygon ex from DF is not in this cube (no weakness makes it pretty much impossible to play around), there are 4 copies of Flygon HP that are fantastic by themselves. Swift hits through all effects, so damage-reducing decks like Dewgong and Kingdra ex won’t be able to stop you. The energy acceleration from the poke-power also allows you to enable several other attackers in this cube, so Flygon is much more wide-open than most of the other Stage 2 strategies you might pick up, and it also always gives up just 1 prize card.
Key cards:
-Low Pressure System gives flygon a little bit of extra staying power, especially when coupled with Special Metal Energy.
-Strength Charm allows Flygon to cleanly 2HKO most strategies in this cube, since Swift won’t be shut down by damage-reducing effects. Castaway allows you to search out Strength Charm, while also having a consistent supply of energy for Delta Supply.
-Windstorm will be crucial in order to get around Cessation Crystal. Other stage 2 strategies might be able to function while being locked out of their poke-powers, but Flygon’s energy acceleration is crucial in enabling this deck.
Synergistic Archetypes
This section will cover different synergies that are supported in the cube. These archetypes have several different pokemon that fit within them, and can be built in a number of different ways. Mix and match the pokemon lines you find to be open in your cube draft and see what you can come up with!
Spread
Spread decks have a couple of strong tools, and can clean up games in a couple of ways. You can spread damage around the board and set up multiple KOs at once with techs like Absol ex or Ancient Technical Machine Rock, or you can use the small amounts of damage to set up OHKOs with large cleanup pokemon late game, like Nidoqueen. You’ll want to prioritize Desert Ruins and Cursed Stone, since there are only 3 of each in the cube. You can also consider cards like Mysterious Shard or Buffer Piece, to potentially buy you an extra turn of damage.
Sniping Effects

Rather than spreading damage around to several threats at once, sniping decks will typically target down one or two specific threats on the opponent’s side of the board. This allows you to potentially take down evolution decks before they set up, or at worst, soften up the higher-hp pokemon for later. These decks much more commonly carry finishing pokemon that will output consistently high damage, like Nidoqueen. Absol ex is borderline first pickable in this deck and the spread decks, so be sure to take them early if you see them. Prioritizing switching cards like Warp Point and Fluffy Berry is strong as well, since it allows you to switch between your heavy hitters and your snipers depending on the situation. Decks that need to guard themselves from snipe decks could pick up healing cards like Espeon, or bench protection from Cloyster.
Hard Aggro

A couple of pokemon in the cube have the potential to stomp the opponent out of the match before they really get a chance to set up. I remember the first time we ran this cube, Cody and I both thought Mightyena and Nidoking were a little weak and might not make the final cut. Our friend Alex absolutely stomped us with both cards at the same time. Putting out 70+ damage starting turn 2 is enough to seriously threaten evolution decks and their abilities to set up for late game wins. In decks like this, Warp Point is nice to force the opponent to push up pokemon on the bench that they were hoping to save for later. Strength Charm can be useful to help break through and take crucial KOs. Cessation Crystal can be nice too, because when you’re swinging for 70+ a turn, shutting of Poke-Powers will make it harder for the opponent to get back into the game.
Disruption and Damage Reduction
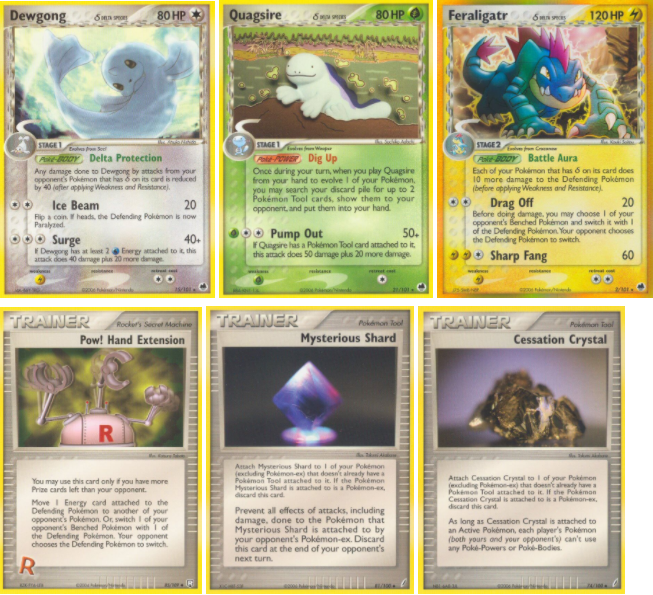
Several cards carry an ability to hinder the opponent’s damage output or setup plans. Pow! Hand Extension is the only gust effect in the cube; Feraligatr can accomplish similar effects with Drag Off. Quagsire works well in unison with both of the tools pictured above. If you opt to go this route in your draft, Castaway becomes much more valuable. You can also use cards like Battle Frontier and Buffer Piece to further shut down the opponent.
Universal Techs

The cards above are incredibly useful tech cards that will slot into almost any deck. Absol ex is a fantastic damage modifier that can turn attacks that are slightly short into easy KOs. Absol functions especially nice in spread decks, that will always have excess damage around the opponent’s board, but it does fit into just about anything. Mewtwo DS allows you to move basic energy around your side of the field. This can be really nice in conjunction with Mr. Briney’s Compassion, but it can also be used to simply conserve energy, or even to power up a pokemon more quickly. Togetic functions as a nice counter-attacker in a cube with mostly Delta Species attackers. The colorless attack cost and free retreat mean you don’t really lose much by slotting this into your deck, and it’s a very easy way to copy high-powered stage 2 attacks without much setup. Tauros CG can function as a setup pokemon with Call for family, but the its poke-power gives you a nice way to play around obnoxious stadium cards, and unlike Windstorm, you can search it out with cards like Holon Mentor. Cloyster Df is the quintessential anti-spread pokemon. It protects your benched delta species pokemon from all attack effects, including damage. (and its attack can be useful in a pinch, especially if you’re running Boost/Scramble Energy.)
Setup and Consistency Cards

These cards are again, nice choices that should slot effectively into any archetype, and each of these will aid the consistency of your deck. Holon’s Castform helps in 2 ways – its delta draw ability makes it an incredible starter pokemon in this cube format. You can pile up a massive hand size early in the game, which makes setting up stage 2 lines much easier in the long run. Holon’s Castform also has a unique “ability” where it can attach itself as a pseudo-double rainbow energy to any pokemon (at the cost of returning 1 energy to your hand), making it much easier to run multiple different types. There are 2 other holon’s pokemon in this cube that have the same effect (Magneton and Electrode) but they won’t draw you cards like Castform will.
Porygon2 is a fantastic draw engine. It usually is at its best in stage 1 and basic-centered decks, since they will empty their hands out much more efficiently in most cases, but you can slot it into any deck with relative ease. Nidoqueen is a unique tech that can search out any pokemon from your deck each turn, and it can also function as a hard-hitting attacker with its Vengeance attack (shades of Plasma flareon!), which takes only colorless energy. Fearow CG has a similar effect, however it only searches out delta species pokemon. Milotic is an interesting case. It raids the opponent’s hand for a second supporter card each turn. Most often you’ll grab something like Celio’s Network to search a pokemon, or draw cards like Holon Adventurer. However sometimes the supporter in the opponent’s hand might hurt you (such as Rocket’s Admin to a lower hand size) and if that’s the case, you don’t need to use the supporter if you don’t want to.
Ledian and Lickitung are 2 other options you have to pile up cards in your hand, but they both have secondary uses as well. Ledian can search for any 1 card when you evolve into it, which has a ton of versatility. Sometimes you will use this to search out a pokemon tool (like Cessation Crystal) to attach to it, triggering the draw 3 effect immediately. Other times you can hold it for late game, searching out a crucial piece to set up a game-winning attack with something like Pow! Hand Extension. Lickitung on the other hand, while also being a draw engine, can snipe Delta Species pokemon on the bench for 30. This is especially useful in punishing decks that use Holon’s Castform for a slower setup than normal.
Other setup options not listed above include Tauros CG with its Call for family attack, searching basics out with ease, as well as Jirachi HL, which makes it easier to evolve your bench, especially if you weren’t able to snag many copies of Rare Candy.
Pick Priority
I do want to spend a bit of time talking about how to prioritize picks in a draft – however this topic is very tricky. Decks will draft and value cards differently depending on what their strategies are, and even your very 1st pick can potentially change the value of the cards you pick up later in the draft. For the purposes of this section, assume that each pick is a “pack 1 pick 1” where you have not drafted any other cards yet to influence this pick.
Also note that when talking about the priority of cards to pick, this is very reflective of MY OWN drafting philosophy in this one specific cube. The way I draft probably differs from the way Cody Walinski drafts when we play together, and we both might draft differently should we play somebody else’s cube.
High Priority

In one word, the above picks could be described as “consistency.” For the first pack, I tend to heavily favor consistency cards rather than powerhouse stage 2 pokemon. The reason for this is simple: If I pick say, a Salamence ex, this card is ONLY good if I happen to grab other salamence cards to play with it later in the cube. For all I know, one of the other players might have also picked a Salamence card, and I might not see any more for the rest of the draft. The cards above are strong consistency cards that slot well into my deck no matter where I end up, allowing me to wait and see what stage 2 and stage 1 pokemon get passed to me later in the cube. Part of the fun of cube drafting to me is that you almost never draft the same deck twice, and drafting consistency allows you to wait and see what pokemon are getting passed to you. The cards above are especially useful because they will slot well into almost any deck that picks them up, and they also have a fairly high power level. As a result, they tend to get drafted very early, so it is less likely that you will see any of these cards later in a given pack.
Medium-High Priority
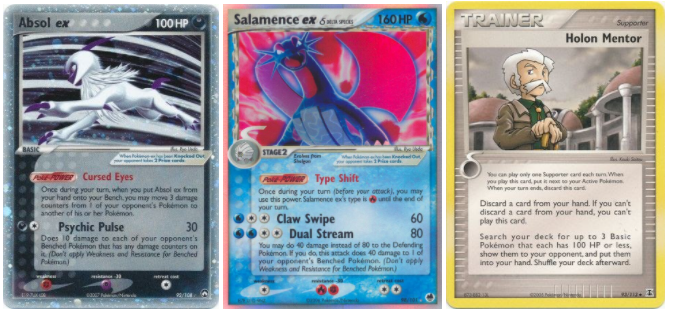
Consistency cards like Holon Mentor and Scientist fit perfectly into this category as they are a touch weaker than the prime choices (like Holon Transceiver, which can grab or re-use any Holon supporter from your deck or discard pile) but they will still slot nicely into basically any deck. There’s also a much higher amount of Mentor in this cube than there are other supporters, so you can afford to take it a little later. (Unlike Holon Transceiver, which also appears in higher quantity, most decks don’t want to run 3-4 Holon Mentor). This is also where I would slot the powerhouse pokemon that you can center your deck around – Salamence is pictured, but this is also where I’d take cards like Gardevoir, Meganium, Shiftry, etc. Strong stage 1 pokemon like Exeggutor would be good choices as well. If there’s not a premium consistency card in the pack, I think it’s perfectly fine to start thinking about who you might want to center your deck around. Absol ex is borderline 1st pickable in dedicated spread and snipe decks, but in your average deck that doesn’t focus on either trait, it’s not as necessary to value it so highly.
Medium Priority

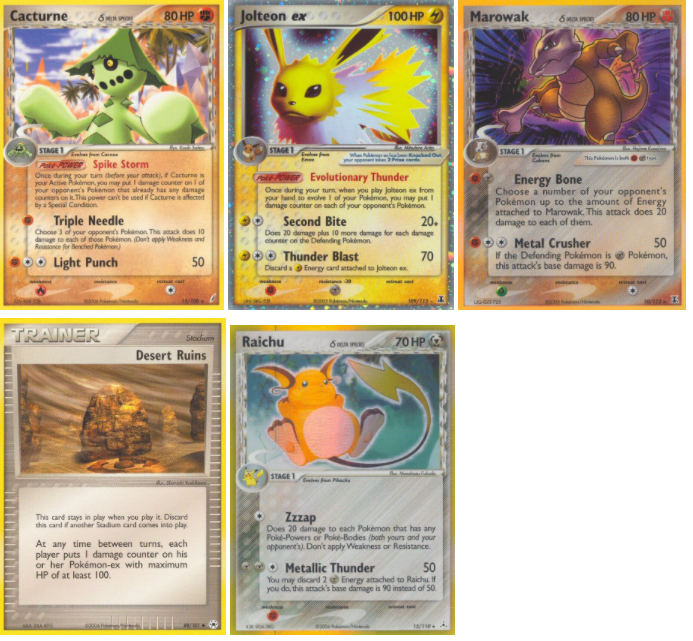
Medium priority cards are interesting – these ones will shift a lot depending on your deck. Cards like Pow! Hand Extension and Desert Ruins are situational and incredibly powerful, but they also run the risk of being situationally dead cards – I’d pick them highly, but only if I knew my deck would take advantage of them. Holon’s Magnemite, like Holon’s Castform has an “ability” to attach itself as an energy, although it only provides a colorless. This seems weak on the surface, but the fact that you can search it out with cards like Holon Mentor and Celio’s Network add to the consistency of your deck. The first couple of cubes we ran, Cody never bothered to pick up Holon’s Magnemite and lost a couple of games because he couldn’t find an energy card early. Togetic is another placeholder pokemon here – this is where I would take all pokemon that are strong tech options, but aren’t quite powerful enough to center a deck around. Togetic DF is one example, but cards like Cacturne CG and Marowak DS are good examples as well.
Medium-Low Priority

Cards can fall late in the pack for a couple of different reasons. In this case of cards like Quagsire or Ampharos, it’s because not every deck will be built to take advantage of their unique traits. Ampharos abuses Boost Energy fantastically, and even as a stage 2, has the ability to put out large amounts of damage very quickly, but it’s not set up well for decks that want to play defensively and heal. Quagsire allows you to re-grab Pokemon Tool cards which can be crucial for disruptive decks who want to re-use Cessation Crystal or Mysterious Shard, but it’s not set up well for decks that want to play aggressively. In other cases, cards will fall because there are several copies or stronger cards. Celio’s Network is a fine consistency card but it can be a little slow, and it doesn’t search out EX pokemon. TV Reporter is one of the many “draw 3” cards that pokemon has seen over its years, and they are a dime a dozen. Most decks will prefer Steven’s Advice, Mary’s Request, or even Holon Adventurer because it has the potential to draw 4, and it can be searched/re-used with Holon Transceiver, but if you need a draw option and are late in the draft, TV Reporter will get the job done.
Low Priority
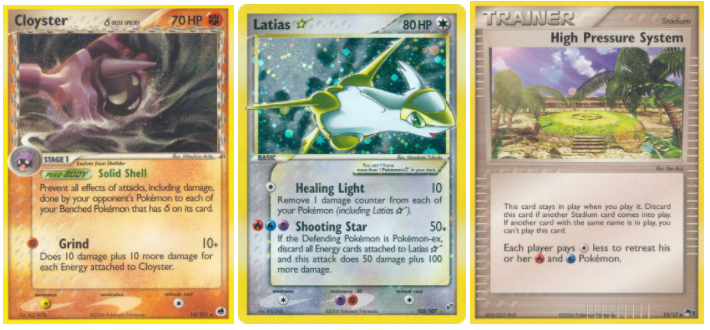
So let’s be clear – cards that are low priority are not “bad” cards. In the right deck, they can be fantastic additions. These are cards I would feel safe passing the first time I saw them in a pack, and hoping that they made their way back around the table to me. Most of the time your last picks in a pack will be pretty scripted – if a decent consistency card or a solid attacker has fallen late because nobody else is interested in the type, you can snap it up and be happy. Otherwise you just pick the card that fits best into the decks you’ve got the cards for. High Pressure and Low Pressure System are textbook examples – in a fire/water decks or grass/lightning decks, these cards can be amazing. In any other deck they’re dead cards. Thus, picking them up late is fairly easy to do, allowing your early-pick focus to be on more powerful cards, or cards that will be useful no matter what type you fall into. Latias Star was most notable for its accomplishments in LBS in 2006 – you could use Blastoise ex in combination with Holon’s Magneton to power it up in one turn. There are some similar effects in this cube (most notably Meganium ex and Metagross DX), but you can pull off some tricky shenanigans with mewtwo DS as well. Cloyster, as well as some other cards like Crystal Shard are kind of the opposite of the High/Low Pressure System conundrum – rather than being useful in ONLY one deck, they are useful AGAINST specific decks. Cloyster is a good late pickup if you want to protect yourself from snipe attacks. Crystal Shard allows you to swap your type and hit Salamence and flygon for weakness, although it’s also useful in general for fighting-types, as a lot of pokemon in this cube carry resistance to fighting.
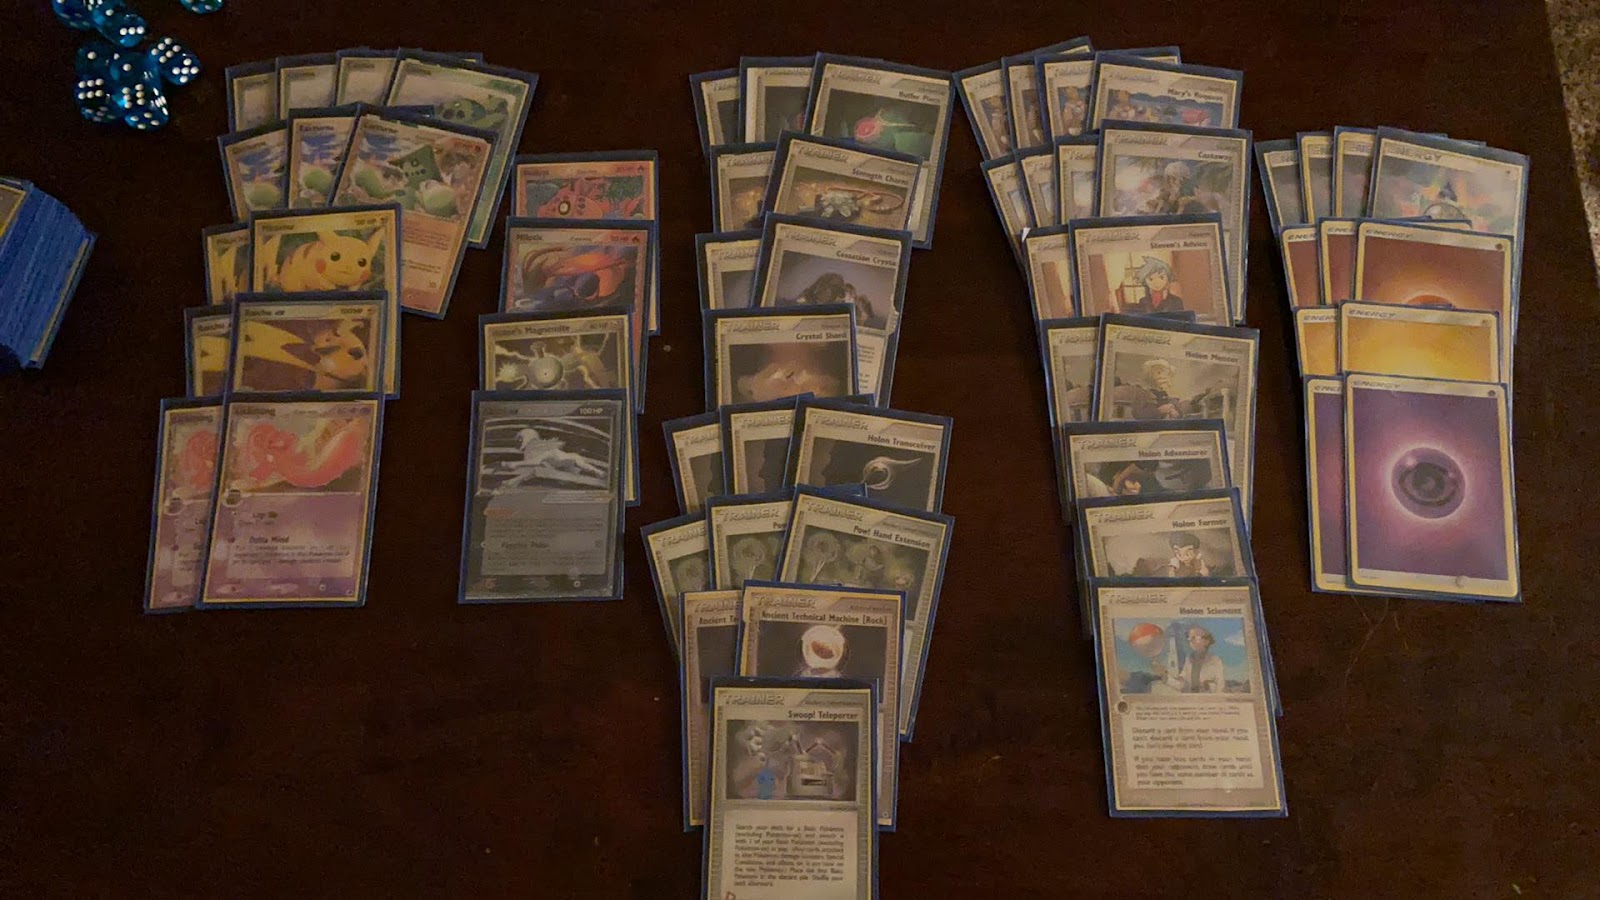
Decklists!
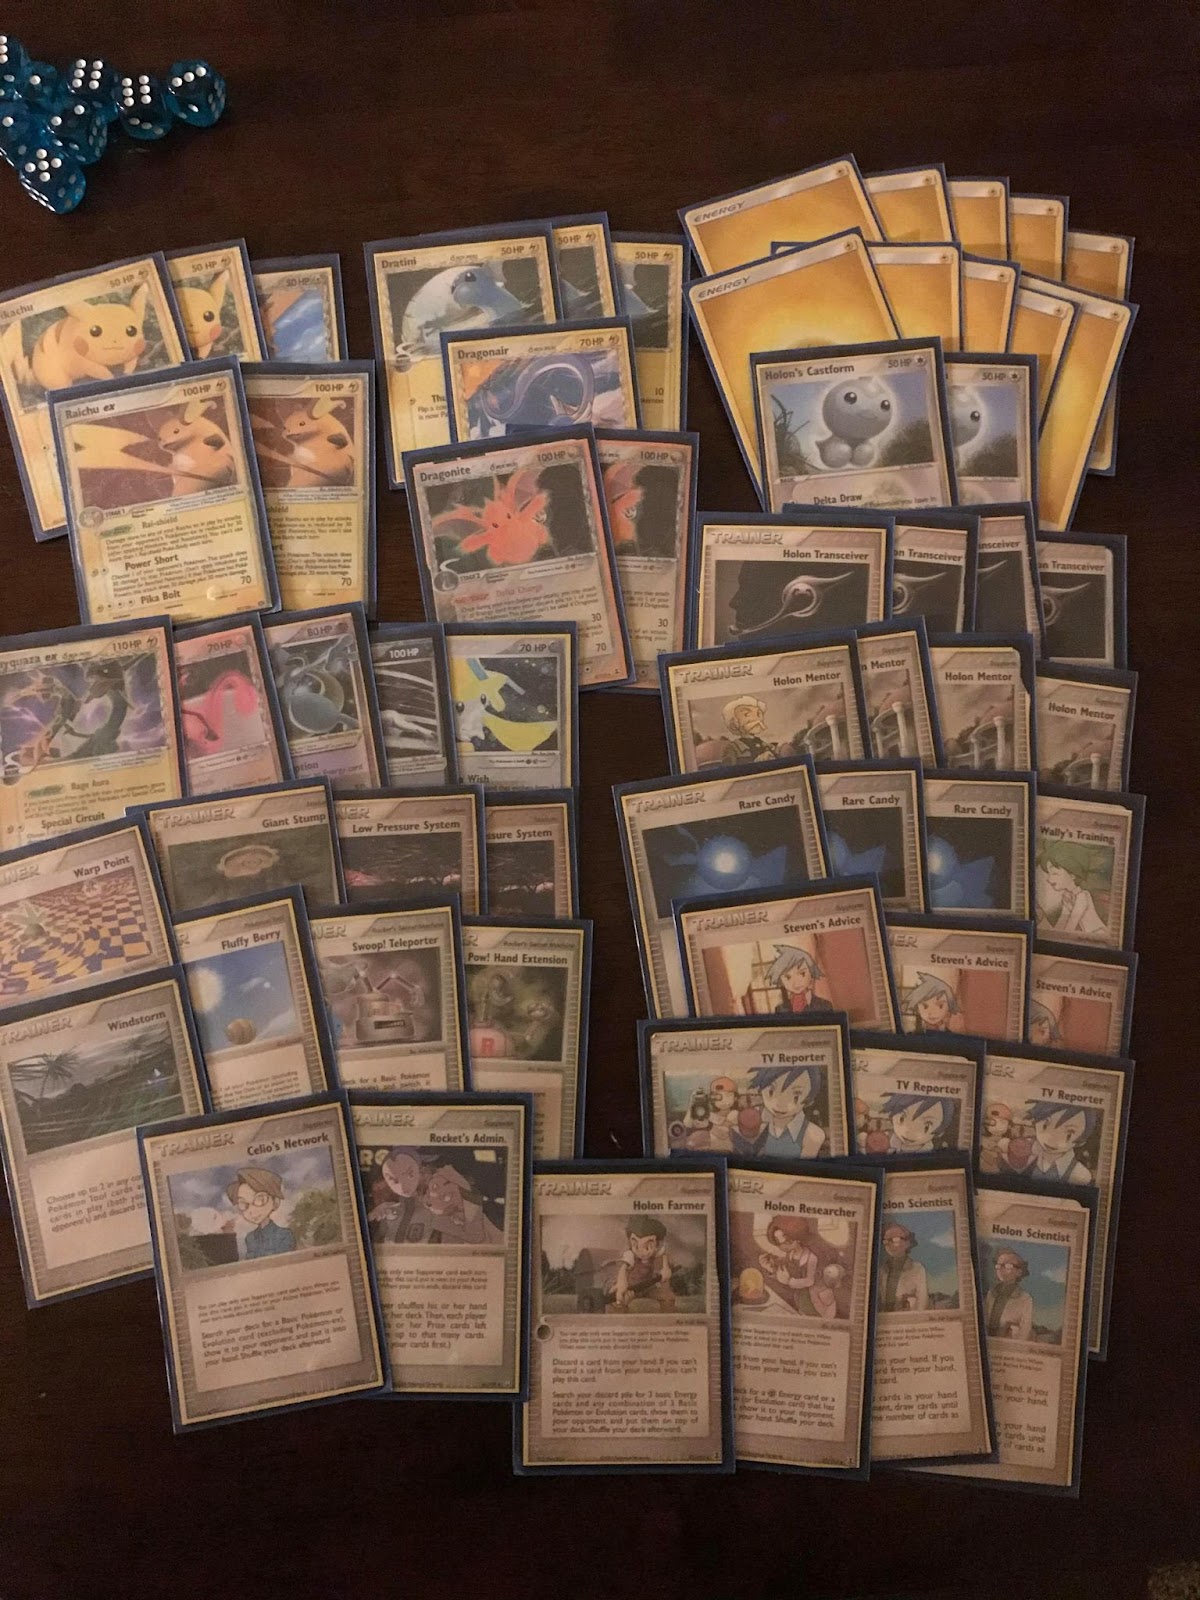
Decklists pictured below have all gone either 2-1, or 3-0 over the many times we have run this cube draft. There are still many combinations and decks we haven’t tried yet, so don’t be fooled – this is by no means a comprehensive list of every archetype in the cube. (Apologies for the potato quality photos, most of these were taken on phone)
This is a list that I built and finished 3-0 with. Dewgong reduces the damage taken from delta-species pokemon, and buffer piece/mysterious shard make it even more obnoxious to take down. Lower count of Holon Transceiver and Holon Supporters here, but that’s to make room for the Castaway engine, which was crucial since this deck needed the pokemon tools to consistently function.
This was another list built by me – this list focused on using Latias ex to pump energy to itself quickly, and start pressuring the opponent early. Vaporeon ex was pretty sick here, as it allowed me to disrupt my opponents that were relying on slow, holon’s castform draw setups while also functioning as an extra attacker since I was already playing water energy for Latios ex.
Cody built this unique sniping list to go undefeated during one of our cubes – the deck focuses on using Cacturne and Lickitung to spread damage around the board early, while Raichu ex cleans up specific threats later in the match. Ancient TM Rock can also clean up evolution decks pretty effectively, since damage will be pushed around the opponent’s board fairly quickly. Buffer Piece gives the deck some extra staying power, and Strength Charm makes the math work out nicely.
Austin Zettel built this unique cube list – in our earlier cubes, he drafted both MetaNite and RaiEggs, and found they weren’t quite as effective as they were in 2006 format. This time he went a different route, drafting Dragonite, and using it to power up various electric-type attackers. He also had the Mewtwo Gold Star, which takes Lightning Energy for its 2nd attack, allowing him to attach Holon’s castform to cover the other two energy types. Rayquaza ex delta is no longer in this cube (no weakness made it very difficult to play around), but he was able to win some of his games off the back of Raichu, Mewtwo, and Dragonite anyways.
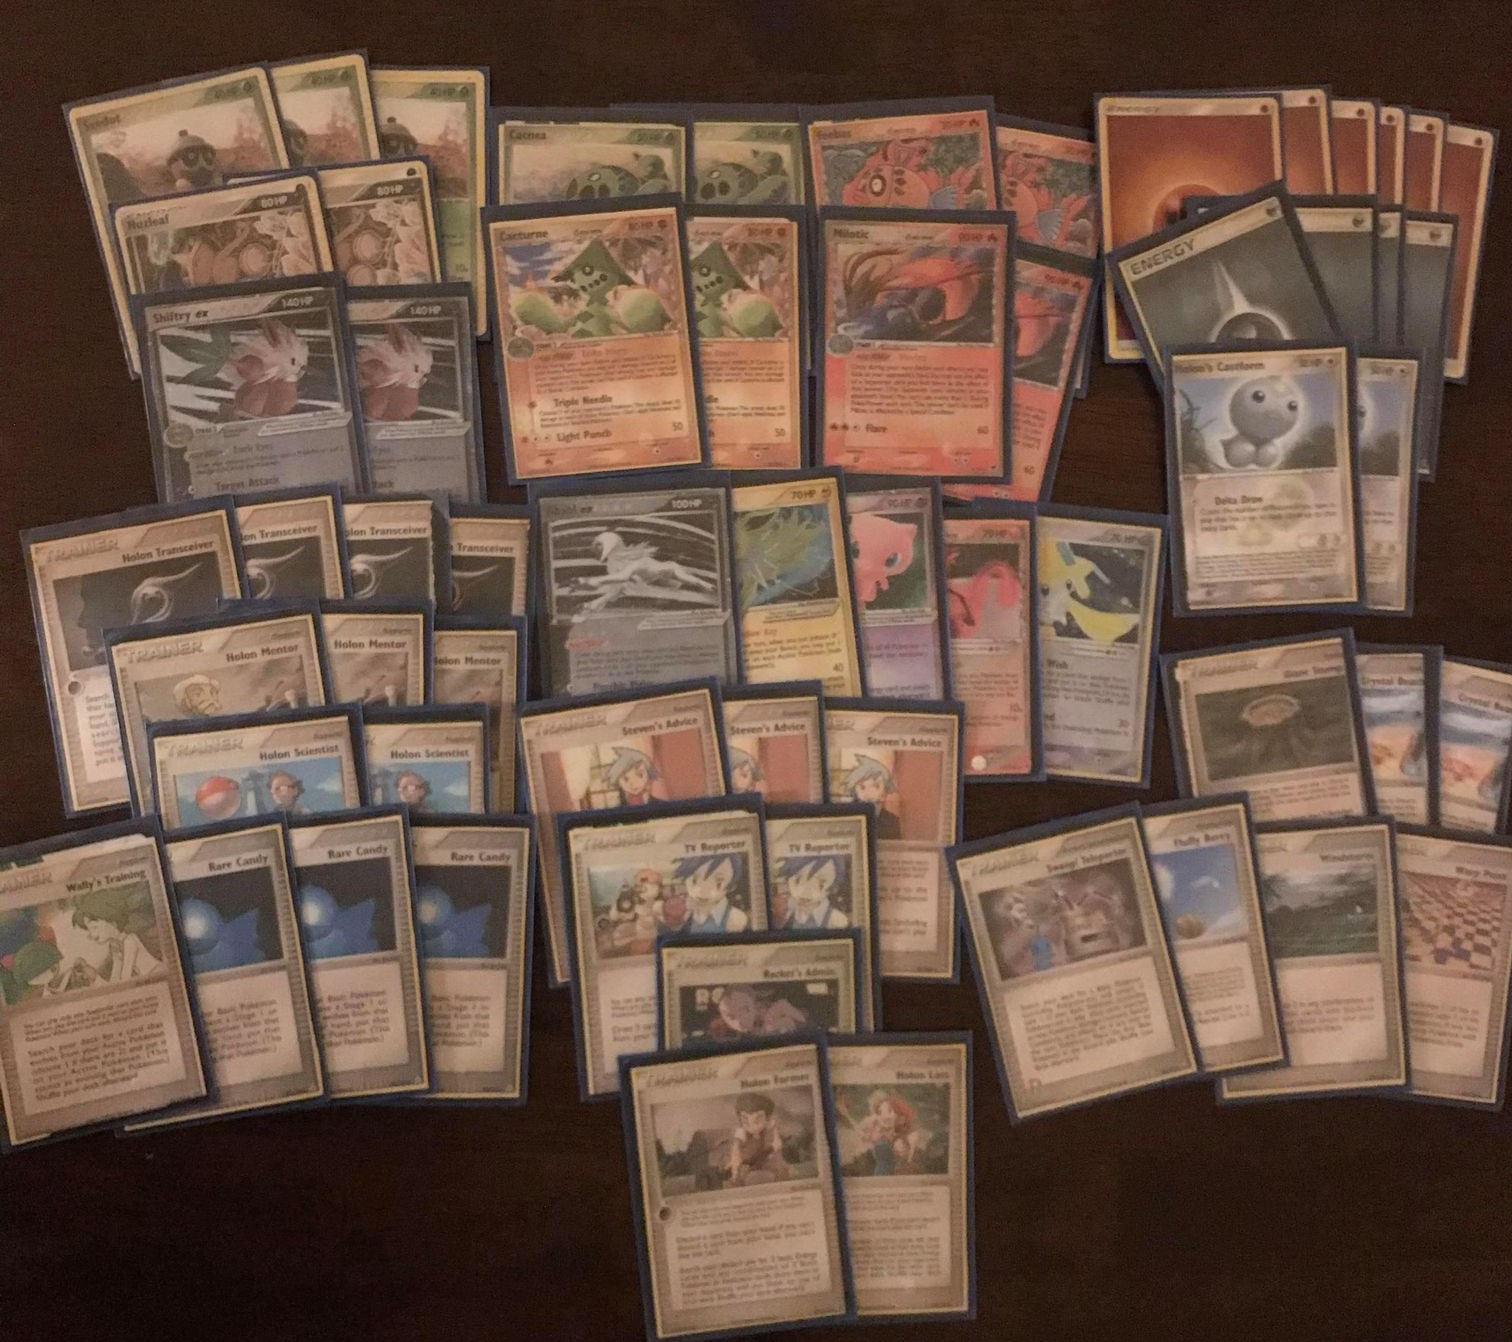
Another creation of Austin’s, Shiftry went undefeated this cube, using Milotic to set up, and Cacturne to help spread damage around. Shiftry punished you for being too reliant on poke-powers as well, and Absol ex essentially meant everything was in range of an easy KO. Giant Stump is pictured here, and is another card that’s no longer included in the cube – the idea was that it could punish people for recklessly filling up their bench, but instead, high-HP ex decks just abused it to remove their attackers in order to prevent prize cards from being given up.
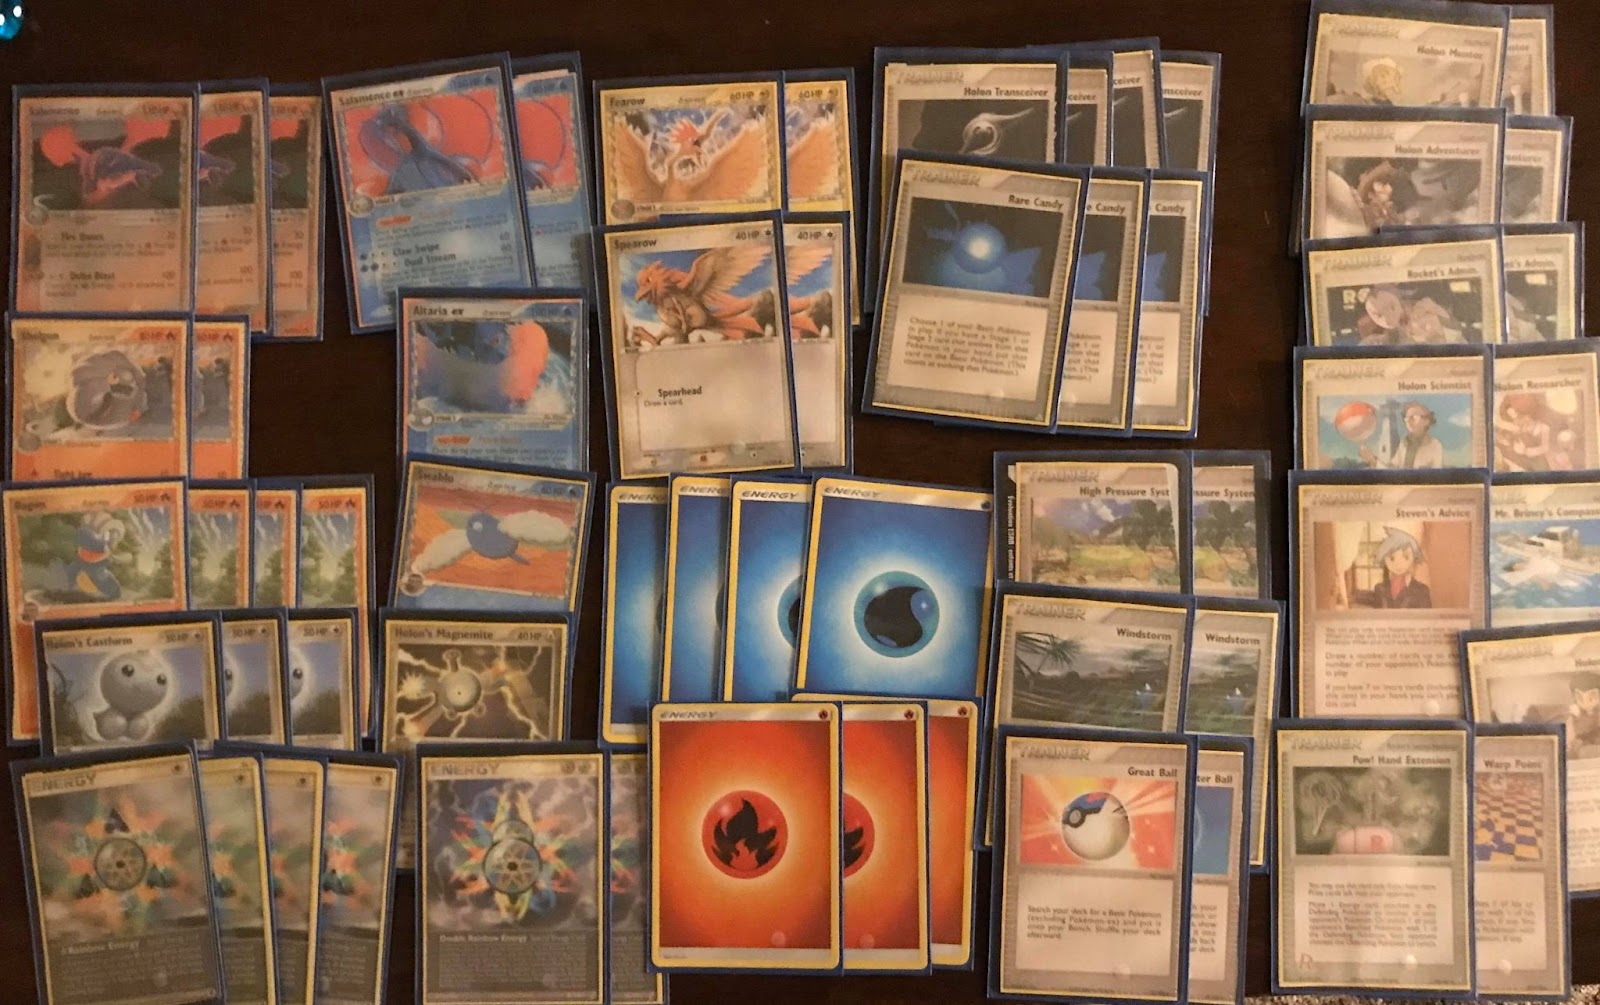
Pictured here is a salamence list where everything went right – the full salamence line got drafted, in addition to the Fearow and Altaria lines to ease the pains of setting up. Mr. Briney’s Compassion came in clutch here as it allowed me to sit behind the 1-prize salamence and then pick it up later, while Pow! Hand Extension really allowed me to benefit from the slower set up behind Holon’s Castform. High Pressure System also significantly increased my odds of starting Castform, since it gave both Bagon and Swablu free retreat.
The world of cube drafting is a deep, challenging, and very fun world to enter. The best advice I can give when creating a cube is to be receptive of feedback – I can guarantee you will not get everything right on the first try. Cody and I had created an entire cube before, and we still had much tinkering to do with this list of cards before we got it to where it is now. If you’re patient and willing to go through the growing pains, one of the most exciting ways to play pokemon that almost never gets old awaits you. Good luck, and happy drafting!
~Sean Worcester
If you would like to see an updated version of what our cube looks like, please refer to THIS GOOGLE DOCUMENT. I will not always be able to update this page every time we swap a couple of cards around, and we are constantly changing things up trying to find the best pool of cards. The google document will be much easier to maintain. Feel free to check it out!
